Inspire Farms Chick Checklist

So you got some beautiful, happy, healthy baby birds! Congratulations! We are very excited for you and look forward to seeing them grow into beautiful egg layers in your flock! Here are some very important tips to review and remember for your birds.

Step One - Arriving Home

When taking your chicks home, give them access to warm (room temperature) drinking water as soon as possible. Gently dip their beaks in the water, so they know what it is and where it is. Most of customers purchase our Strong Animal Chick Care Kit. This kit contains all the necessary supplements needed for raising strong, happy and healthy chickens.

If chicks appear weak or lethargic upon arrival at home, mix about two-tablespoons of sugar into one-quart of warm water and give to the chicks. After 16-hours, switch to the regular water.

Step Two - Brooding Area and Temperature  

Chicks should have a brooding area at least 105-degrees for the first hour and lower the temperature to 95-degrees over the next few hours. You can lower the temperature by lifting the heat lamp. Chicks should be in a brooding area that has a surface temperature of 90- 95-degrees for the first week. Lower the temperature by five-degrees per week until you reach 70-degrees. Temperatures may need to be slightly higher for bantam or polish chicks.

It's important to observe your chicks in their brooding area. Watch the chicks behavior to see if the Temperature is -

A. Too cold – most chicks crowding under the heat lamp.
B. Too warm – most chicks spread out away from the heat lamp.
C. Just right – some chicks are under the lamp, others are near the heat

Chicks should have at least a ½-square foot of space per chick to move away from the heating lamps if necessary.

Block corners of the brooder with cardboard to make wider angles that are harder for chicks to pile on top of each other to prevent smothering. This is very IMPORTANT.

Step Three - Initial Meal Prep

To help chicks start eating, put chick feed on a small flat surface, like a container lid, so they can easily find the feed. This helps deter them from eating the bedding. We recommend using either Pink Rose® or Modesto Milling Starter/Grower and sprinkling First Peep™ (included in our Chick Kit) on top of the feed. First Peep™ is a non-medicated feed supplement that naturally supports digestive health in baby chicks the first few weeks of life. It contains kelp, essential oils, and prebiotics.

Step Four - Brood Area Care and Cleaning

Maintaining a clean and well cared for brood area is vital for healthy happy birds. Keeping the area clean will dramatically reduce issues with health of your baby birds.

Use larger wood shavings as bedding on the floor of the brooding area. Do not use sawdust, sand, cedar chips or shavings, or newspaper. Chicks like to peck things! giving them small chip or sand or sawdust may, and often does, result in digestive issues and even death of the bird. Stick to the larger shavings until they are ready to move out to the coop.

We recommend applying Coop Recooperate™ over the wood shavings (included in the kit above). Coop Recooperate™ is the safe and natural way to care for your coop. Organic eucalyptus and lemongrass essential oils along with diatomaceous earth reduce odor and moisture and help improve the quality of your compost.

Food and Water Fundamentals

We recommend that you shift to layer crumble around 12 to 16 weeks so that your girls have strong bones and are ready to lay that first egg.


We recommend Pink Rose and Modesto Milling starter feed and then the layer feeds when it's time to transition. 

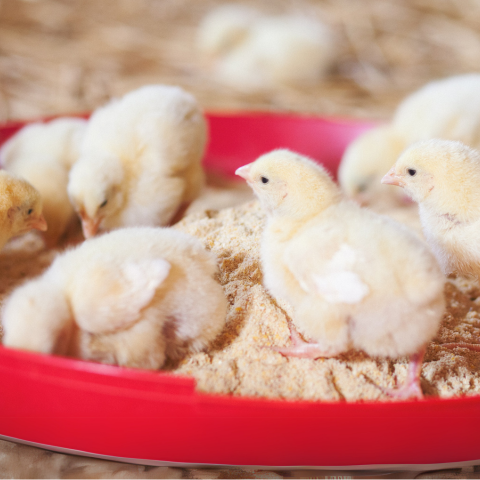
Use an easily accessible one-foot trough feeder or round feeder and a one-gallon waterer for every 25 chicks.

Chicks need continuous access to water and feed. Be mindful, especially when chicks are very young, the waterer should not contain enough water to drown your birds! Once they are older you can implement a bigger waterer. 

A Few Notes on Health

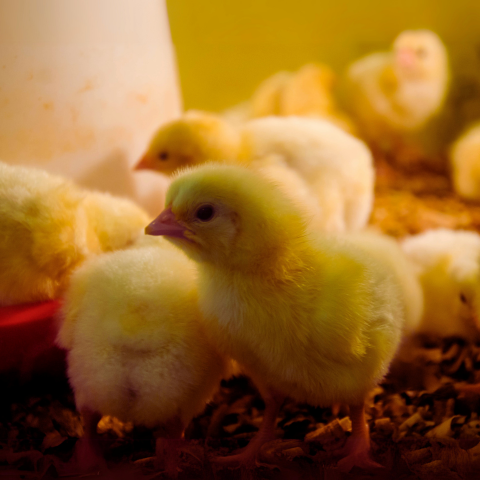
Chicks will use their beaks to groom or peck themselves. Occasionally pecking amongst chicks will become a problem if the brooding area is too hot or too crowded. We suggest using a red heat lamp to reduce brightness and the tendency to peck at each other. 

Occasionally, the rear end of a chick will get manure stuck to it “pasting” up. If you see this happen, very gently wash the “paste” off with a cloth and warm water. Pasting should last no more than a few days and can be caused by stress in the early days of transition from the Inspire Farms shop to their new home.

The Joy and Necessity of Observation

You have everything all set up, the perfect heat lamp, large wood shavings, the Chick Kit, the waterer, the feed, and your chicks. You have read this page, you talked with my staff at the Inspire Farm shop, you have us on speed dial because you know we are happy to help and support you and your flock. What now?

Sometimes the best thing you can do with your chicks is to watch them eat, sleep, tumble and rumble around the brooding area. You'll be surprised to discover that it's actually quite relaxing! Frequent observation will also clue you into any issues that are starting and let you handle them before a problem occurs.

Children LOVE baby chicks! And we love that fact. Just understand that these baby chicks are fragile. Teaching them the joy of observation until the chicks have a few days of the new environment, the food, the pecking order and the environment is recommended. You'll know the right time to introduce awesome fluffy chicks to the rest of the family.